Thatched Roof
This tutorial will give you the details on how to build a realistic looking miniature Medieval thatched roof. Please feel free to print, copy, or reproduce this tutorial in any form. No fees of any kind are required, but a simple credit listing would be appreciated. Enjoy!
Materials
- Black bath towel
- Woodland Scenics Scenic Cement
- Elmer's white glue
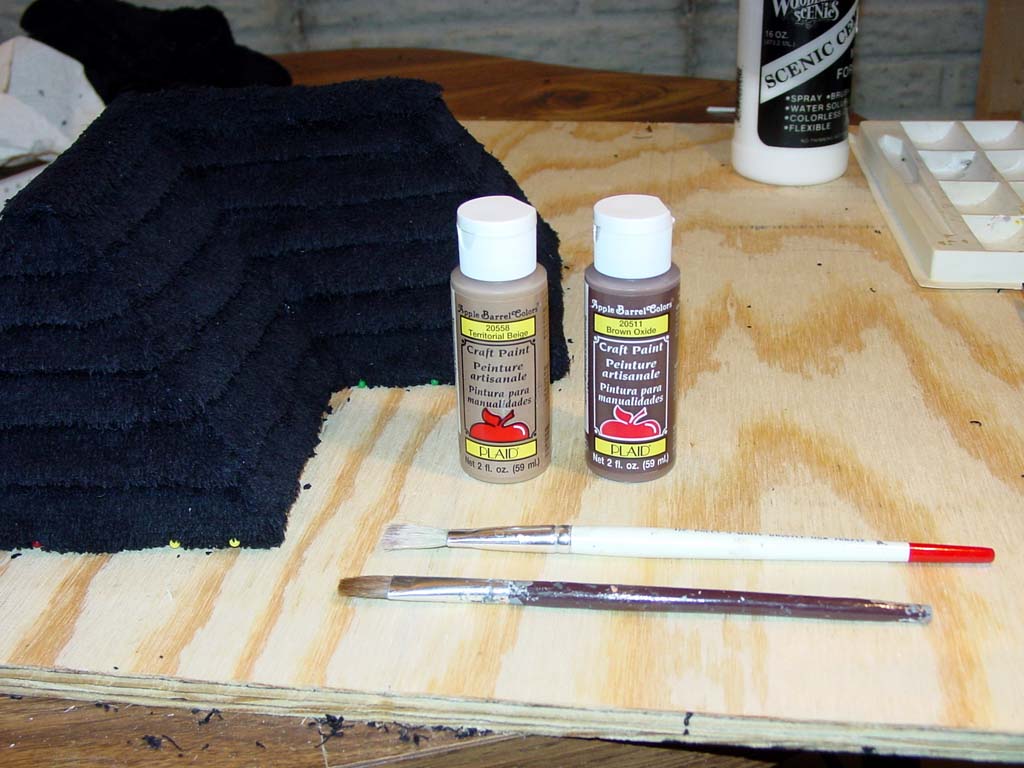
- Apple Barrel Colors by Plaid Brown Oxide (#20511) craft paint
- Apple Barrel Colors by Plaid Territorial Beige (#20558) craft paint
- 1 inch wide Sponge brush
- 1/2 inch soft bristled brush
- 1/2 inch stiff bristled brush suitable for drybrushing
- Kitchen Shears
- Small shallow container for mixing paints
Description of Materials
The black bath towel need not be of high quality. The only requirement is that all of the fibers lay down flat and all in one direction when smoothed over using your fingers. The fibers should not have a lot of space between them - basically you should not be able to see the underlying fabric of the towel when all of the fibers have been laid flat.
Any sort of watered down glue solution will work. Scenic Cement seems to work well since it dries very flat unlike some which dry glossy. It is also pre-mixed so it is far less of a hassle to get a good mix.
Other generic brands of glue should work as well, but I have found Elmer's glue to be extremely strong and fairly inexpensive. I do not recommend buying the washable white glues which Elmer's and other glue manufacturers make. Although not personally tested, the washable types of glue may weaken due to high humidity conditions or may not be as strong to begin with.
In many of my other scenery projects I have used the more expensive Ral Partha or Games Workshop paints, but I have found that paints from Apple Barrel Colors work equally as well and are a fraction of the cost. This type of paint can be found at Wal-Mart in their crafts section. A 2 ounce bottle costs about 44 cents and will provide enough coverage to do an entire village worth of roofs. The exact choice of colors is not fixed - in fact it may be desirable to have some variations on different buildings. The basic requirement is that of a base coat and a drybrush coat. The drybrush coat should be a couple shades lighter than the base coat. Fortunately the Apple Barrel Colors line of paints provides a wide selection of colors so finding some that look good together is not difficult.
The sponge brush will be used to apply the glue solution to the towel. The brush will be reusable when done with the process as long as it is washed out before the glue dries. I have used various brands and they all would do just fine for this task. The 1 inch size seems to give a good balance between control and speed of application, but other sizes will probably work as well.
Various types of brushes will work for the soft bristled brush. Size of this brush is not very important, but I find the 1/2 inch size to work nicely. Plaid has several fairly low cost, good quality brushes suited for this purpose.
The stiff bristled brush's quality is somewhat more important than the soft bristled brush. A brush with hard plastic bristles will not work nearly as well as a brush with natural or higher quality synthetic brushes. The size of each individual bristle will be larger in diameter than those of the soft bristled brush. Again, Plaid brushes will work nicely.
To cut the towel efficiently and without destroying a standard scissors or your hand, a kitchen shears is recommended. I use the Wal-Mart Tristar brand which can be found in the kitchen utensils section. It costs about $4 which is a bargain for how much trouble it saves in the long run.
I use an plastic mixing pallet I picked up at, you guessed it, Wal-Mart. Any small, shallow container should work and, if cleaned promptly, should not be ruined in the process.
Creating the Roof
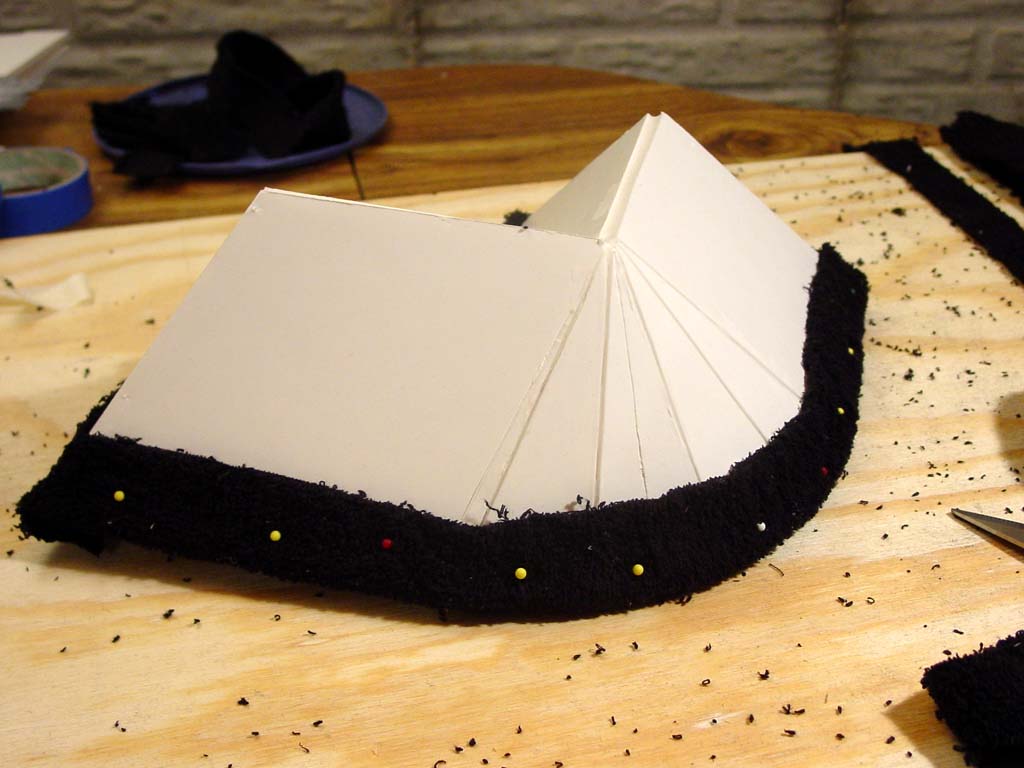
This tutorial assumes that the foam card roof structure has already been built. [Image]
- Figure out which way the fibers of the towel want to lay down.
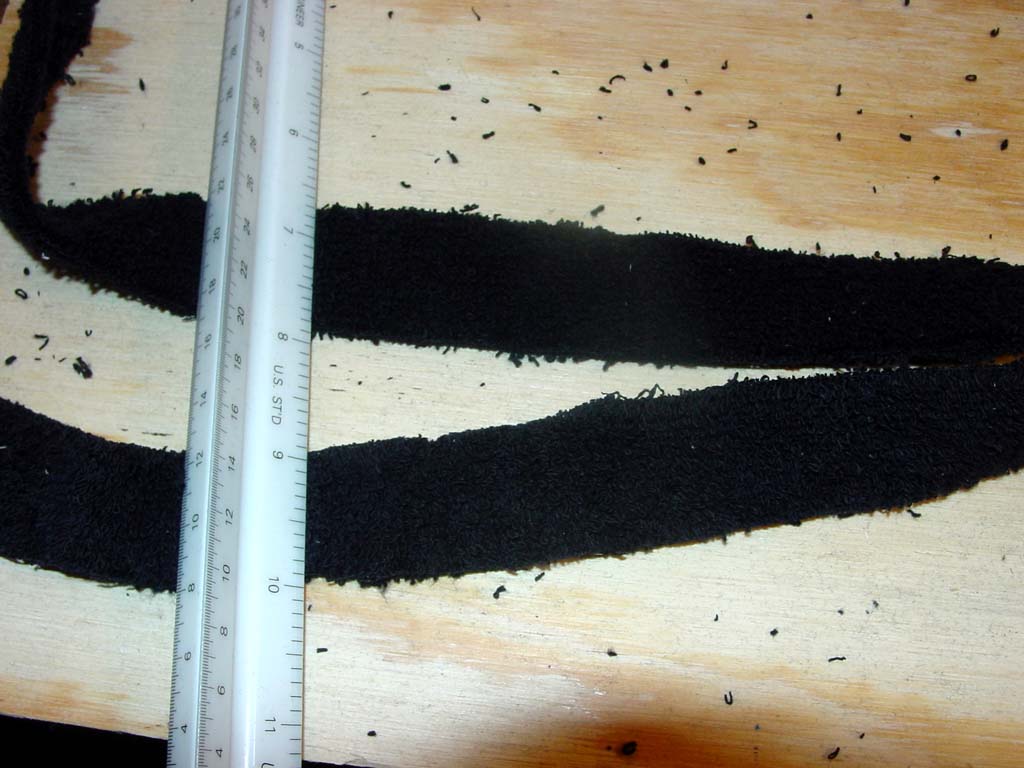
- Cut the towel into one inch strips perpendicular to the lay of the fibers. The measurement does not need to be exact and the cuts do not need to be exactly straight. A little variation here and there will just add to the realistic look of the roof. Use some restraint when adding randomness though - too much will draw the spectator's eye to the roof instead of giving an overall pleasing look. [Image]
- Cut the strips to the length of the roof to be covered. Many roofs will benefit from leaving some extra towel so it can be wrapped around the edge and under the overhang.
- Starting at the bottom of the roof, use the Elmer's glue to attach the strip to the roof. I found it useful to pin the bottom layer since I chose to make the bottom strip wider than the rest so it can cover the bottom edge of the roof as well as the overhang. Make sure that the lay of the fibers is going from top to bottom! [Image]
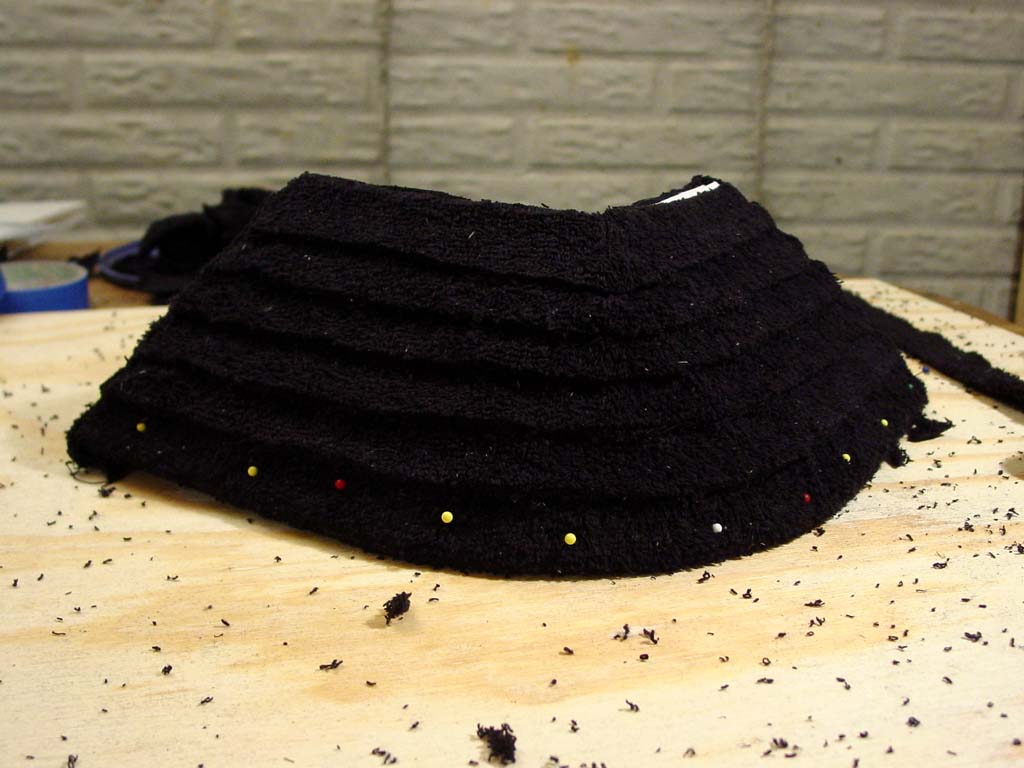
- Apply the next strip of towel to the roof overlapping the previous strip by about 1/4 inch. Be sure to apply some glue on the 1/4 inch of the previous strip which is going to be covered. This will prevent the strips from being pulled off of each other. [Image]
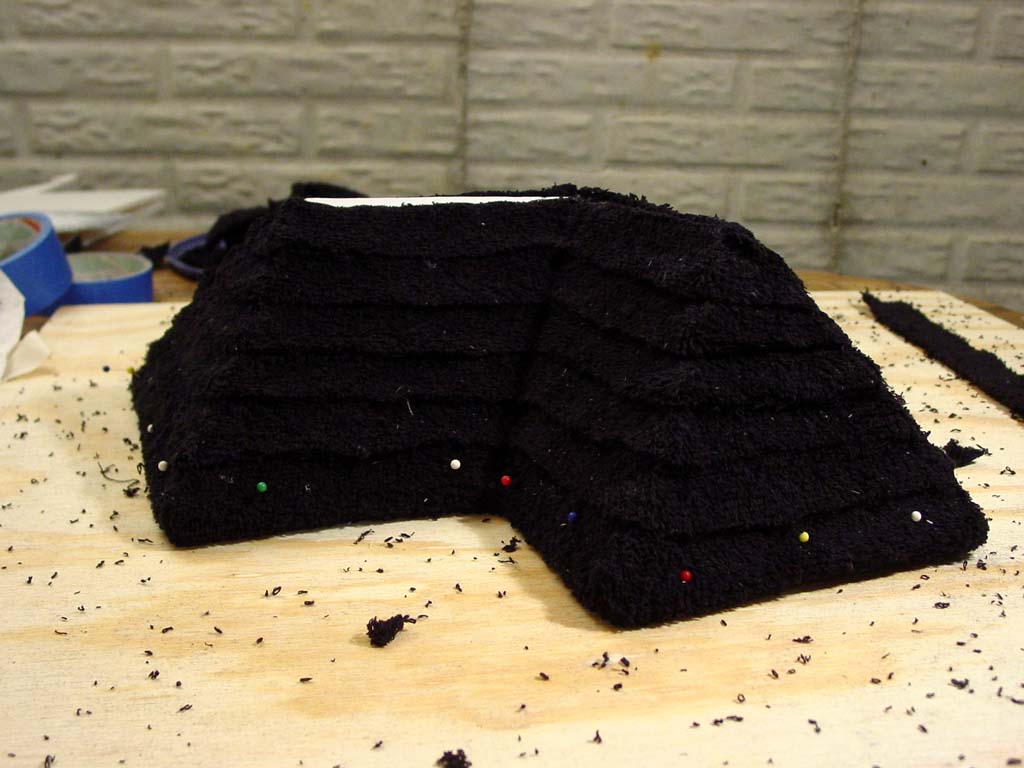
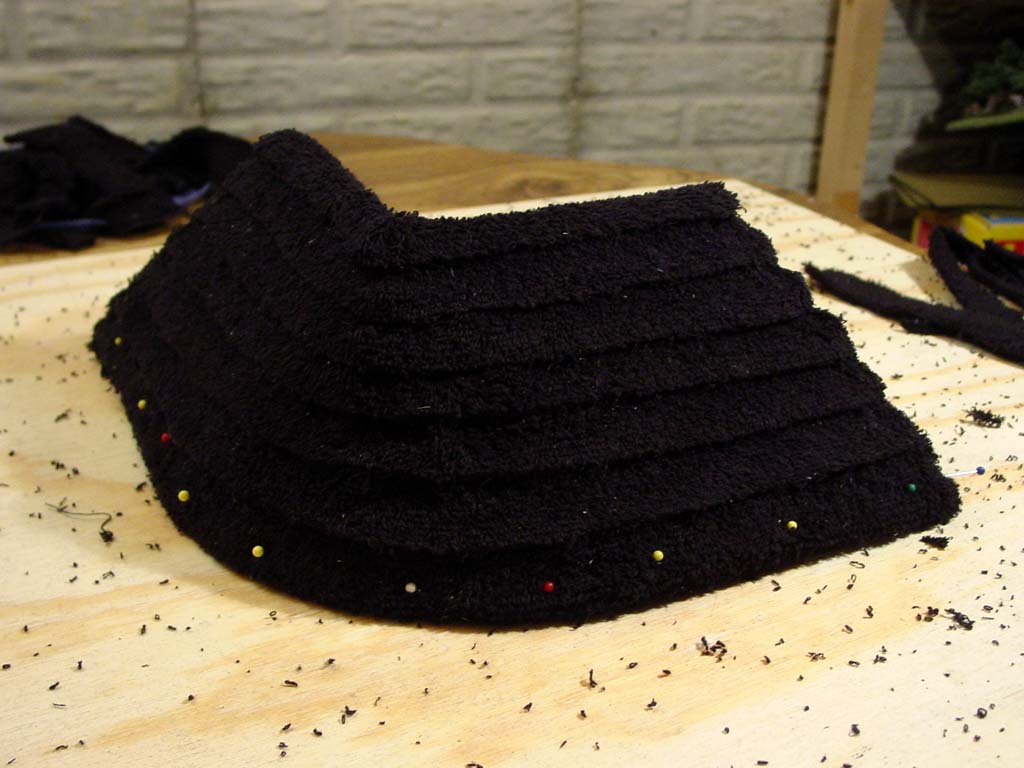
- Continue covering the entire roof with the one inch strips of towel. It is extremely important to verify that all of the fibers lay in the same direction. They do not all need to be set in the same direction at this point, they just need to be attached to the roof according to their natural flow. Be sure to take a step back now and then to make sure each layer of the towel is level. [Image] [Image]
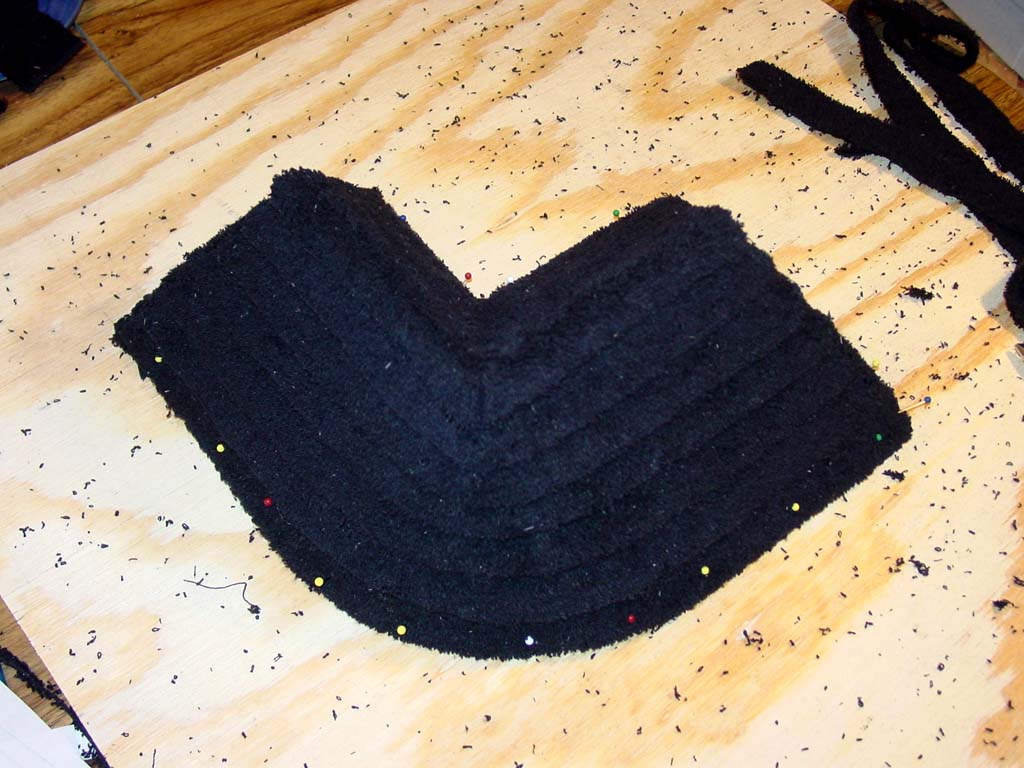
- Eventually you will come to the peak. There is quite a bit of leniency here, but try to get as close to the peak with the last layer as you can. Another piece of towel must be cut to serve as the roof cap. This part is somewhat interesting as the cap fibers need to flow in both directions. This is tough to do and will probably require extra attention in the cementing stage below. [Image] [Image]
- This is pretty much the last chance to look over the entire roof to make sure all the towel pieces are 'flowing' in the right direction. It will also be very difficult to straighten any of the pieces in the future so do so now.
- After the entire roof has been covered with the towel, let the structure dry for a couple hours.
- Pour some of the Scenic Cement into a small shallow dish.
- Use the sponge brush to apply the Scenic Cement to the towel. Now is the time when all of the fibers need to be aligned. Do this by applying from top to bottom while concentrating on one strip at a time. Continue applying the cement until the entire roof has been covered and all of the fibers lay in the same direction. The towel should be wet, but not dripping during the application process. If too much cement is applied then the fibers will become too flattened and will not drybrush well. Another possible side effect of too much cement is warpage of the roof. [Image]
- Allow the towel covered roof to dry over night. This will allow the towel to become somewhat rigid - this will provide a good surface to drybrush.
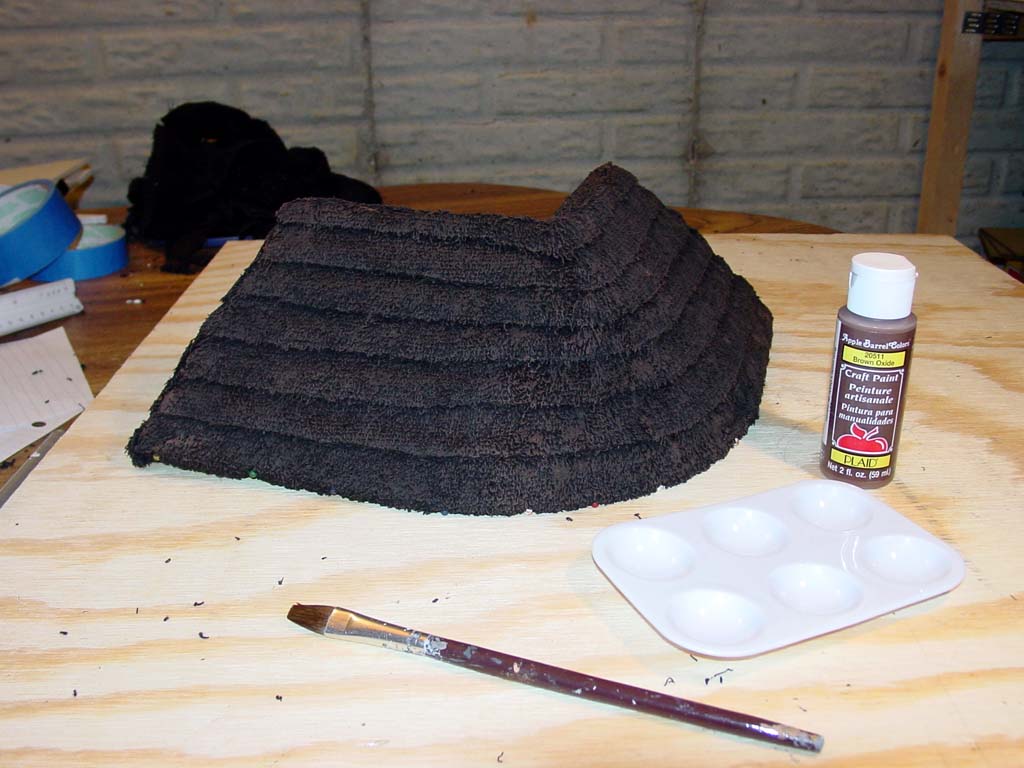
- Using a moderate amount of paint on the soft bristled brush, paint the entire roof Brown Oxide. As done with the cement, apply the paint from top to bottom of each strip. Be careful not to saturate the towel with paint. Having some black show through provides good shadow and gives the whole structure some depth. Allow the paint to dry for about an hour. [Image] [Image]
- Using the stiff bristled brush, take a small amount of Territorial Beige, wipe the excess off on a paper towel and brush across the flow of the fibers. This will highlight the high points of the roof and give it even more depth. [Image]
- Let the roof dry overnight to ensure that the paints have had sufficient time to dry and you now have a Medieval thatched roof!
Back to the main page
Resources
Questions? Comments? Email me at: ryan@skow.org