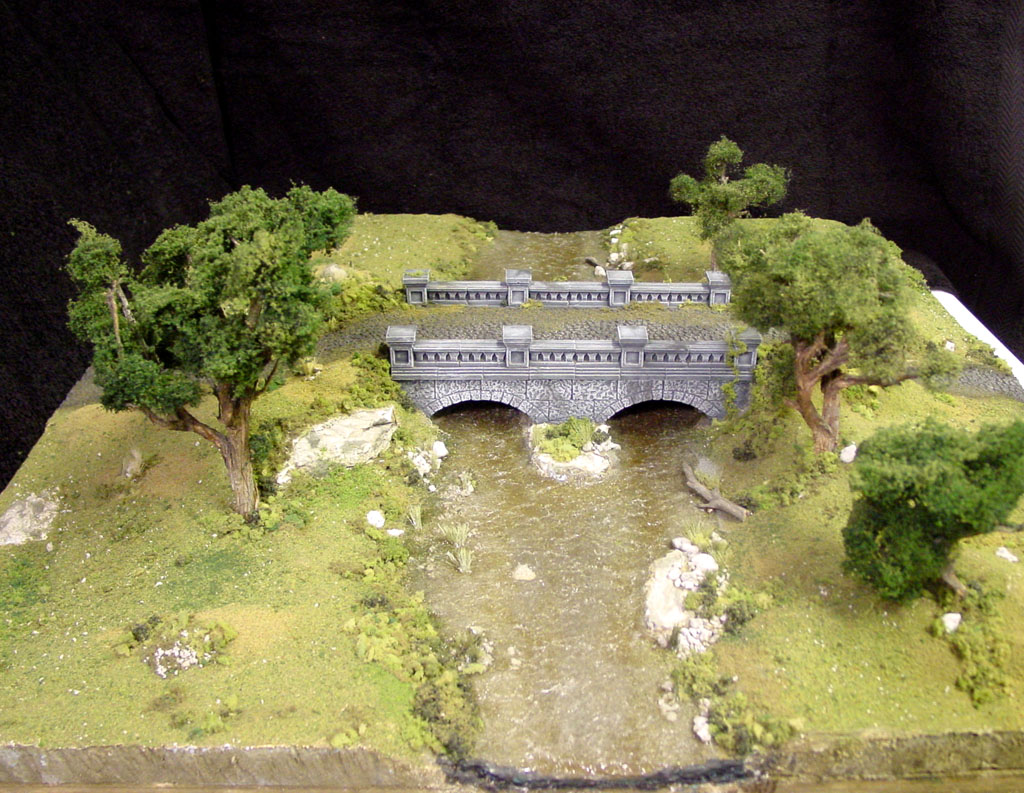
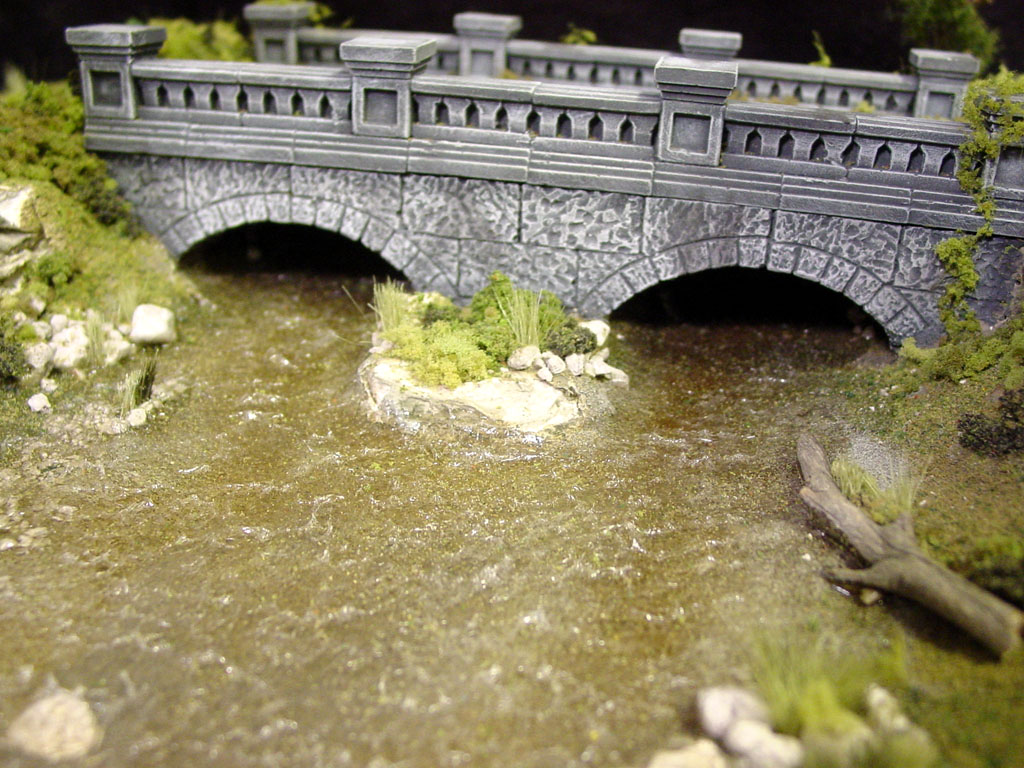
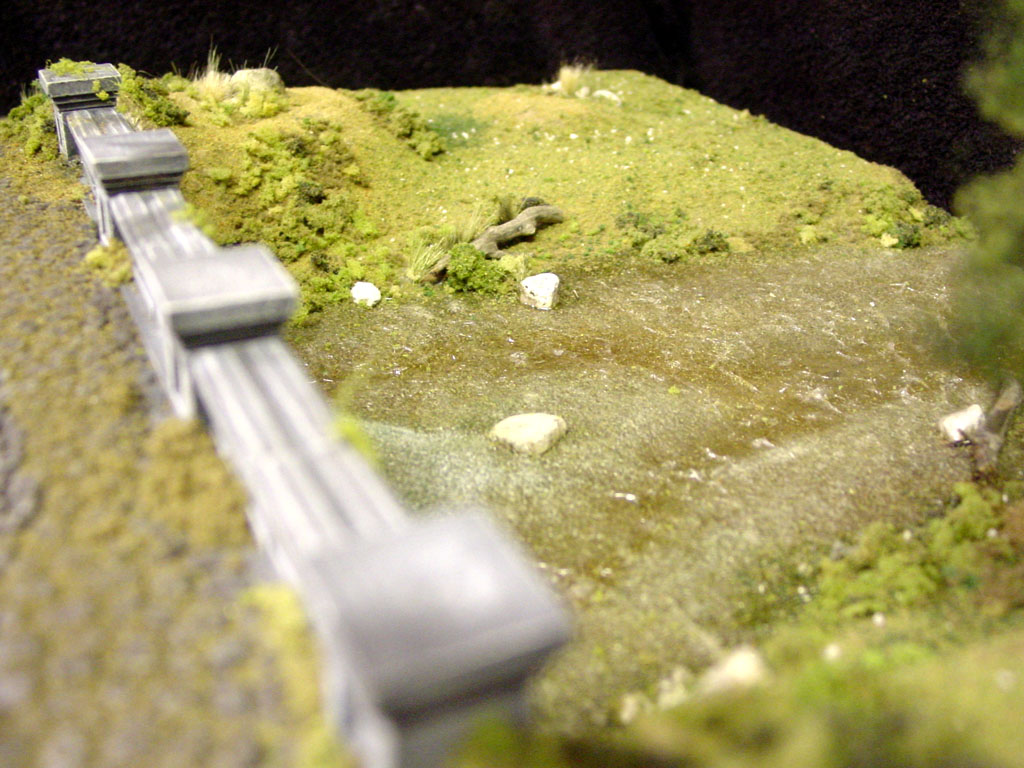
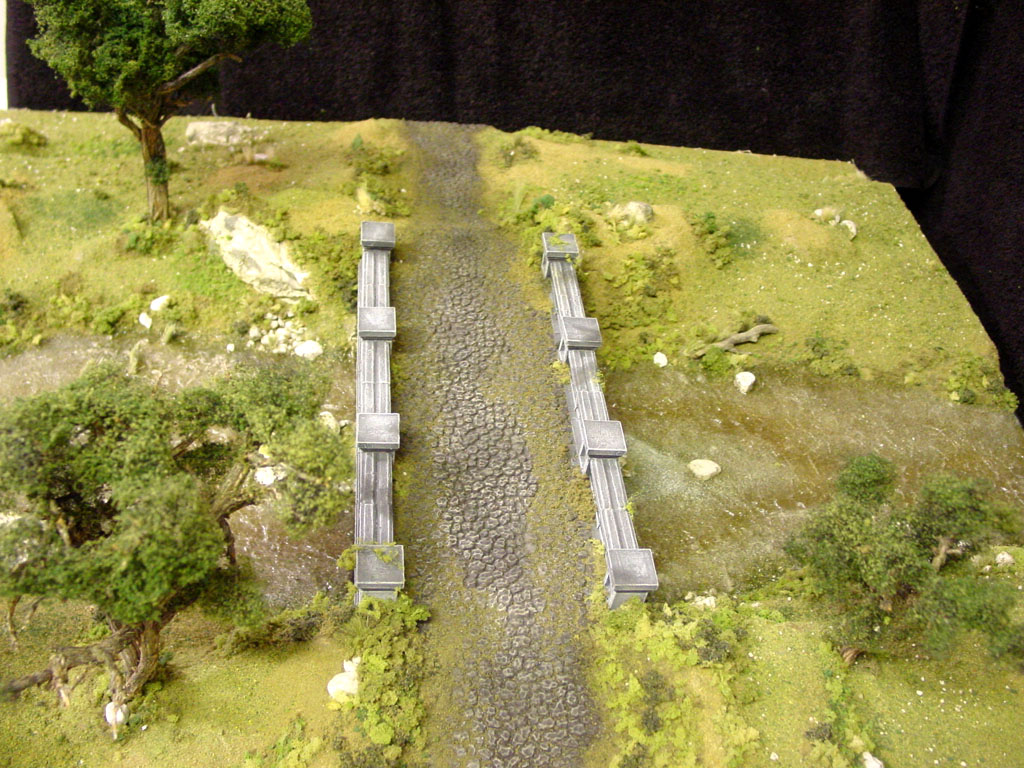
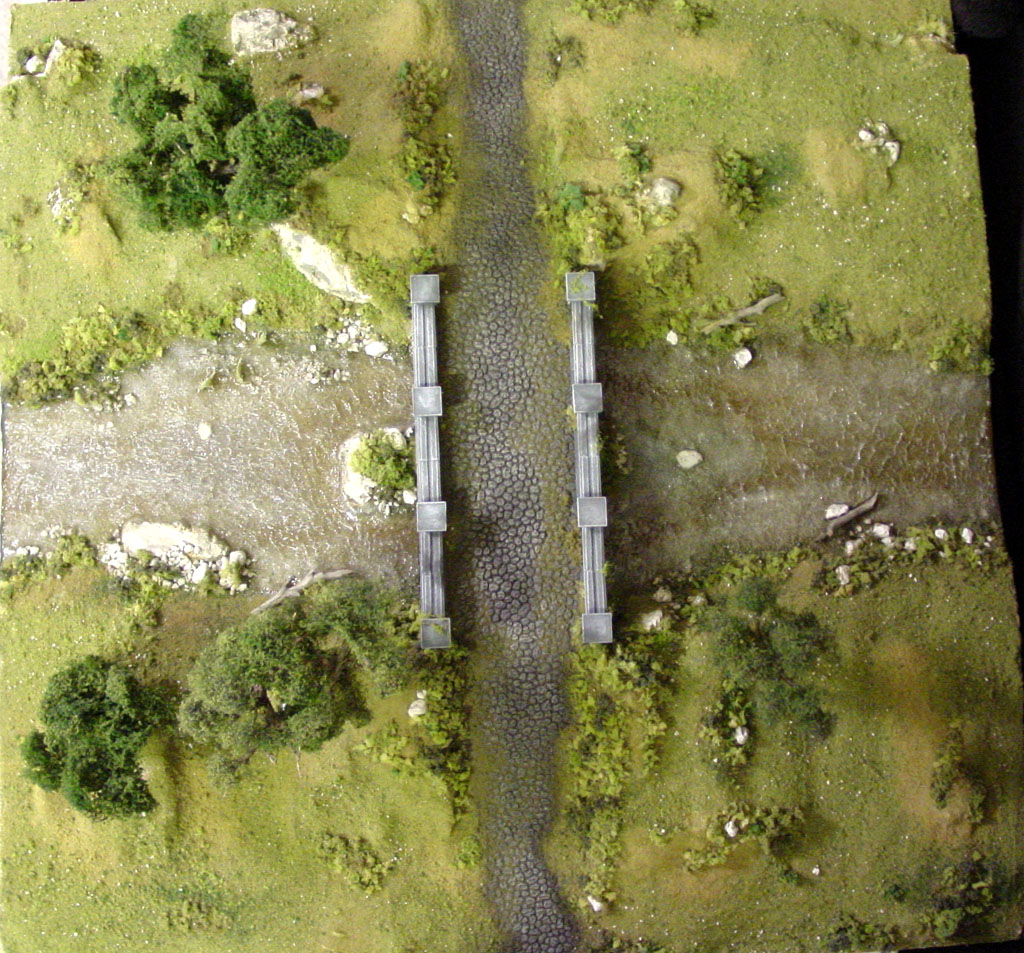
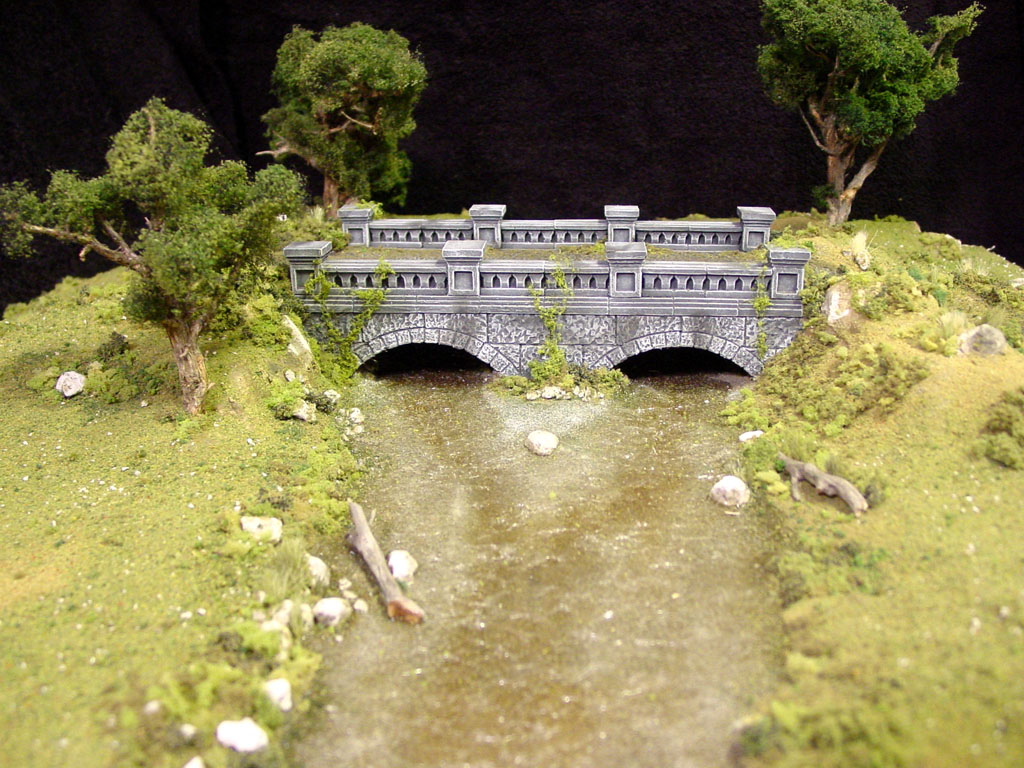
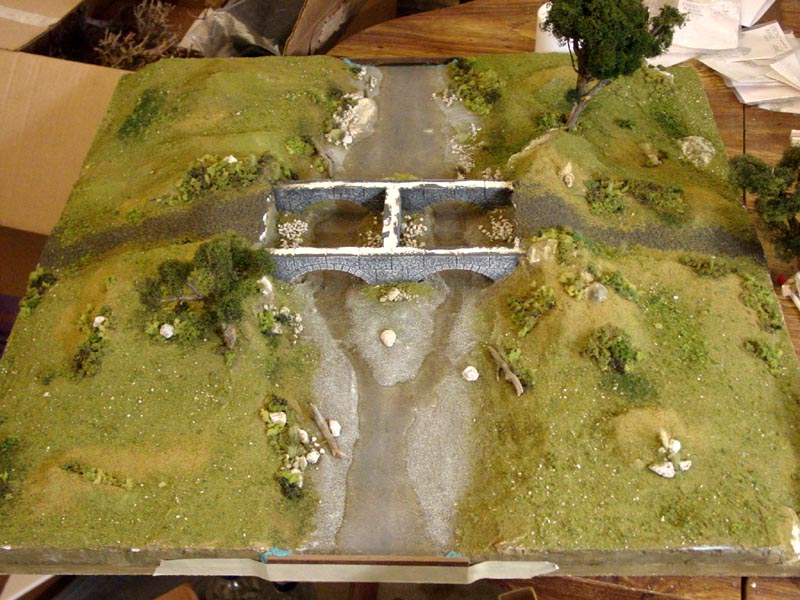
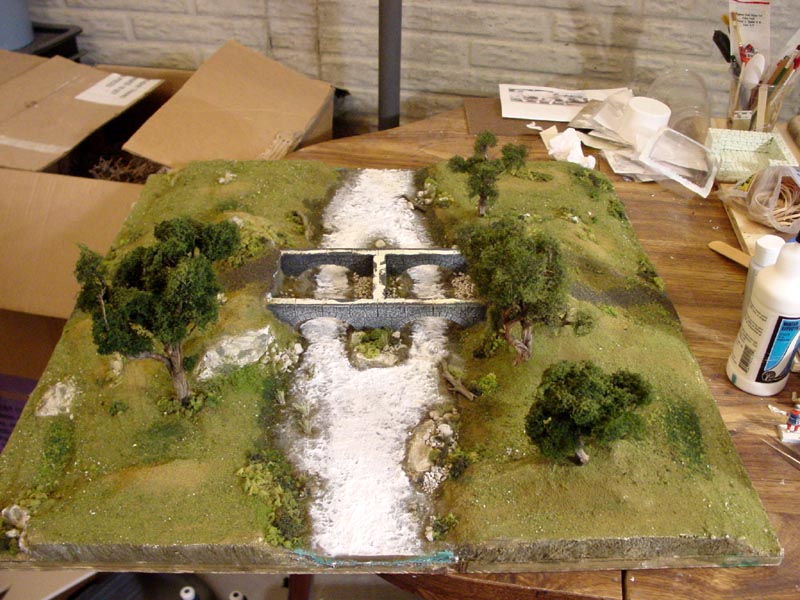
Cobblestone Bridge
This is my first structure fully integrated with a terrain piece. The construction is based on The Traveler's Bridge from the HirstArts
site. The major modifications are the removal of the steps to allow cart
traffic and using cobblestone rather than cut stone. One key feature of
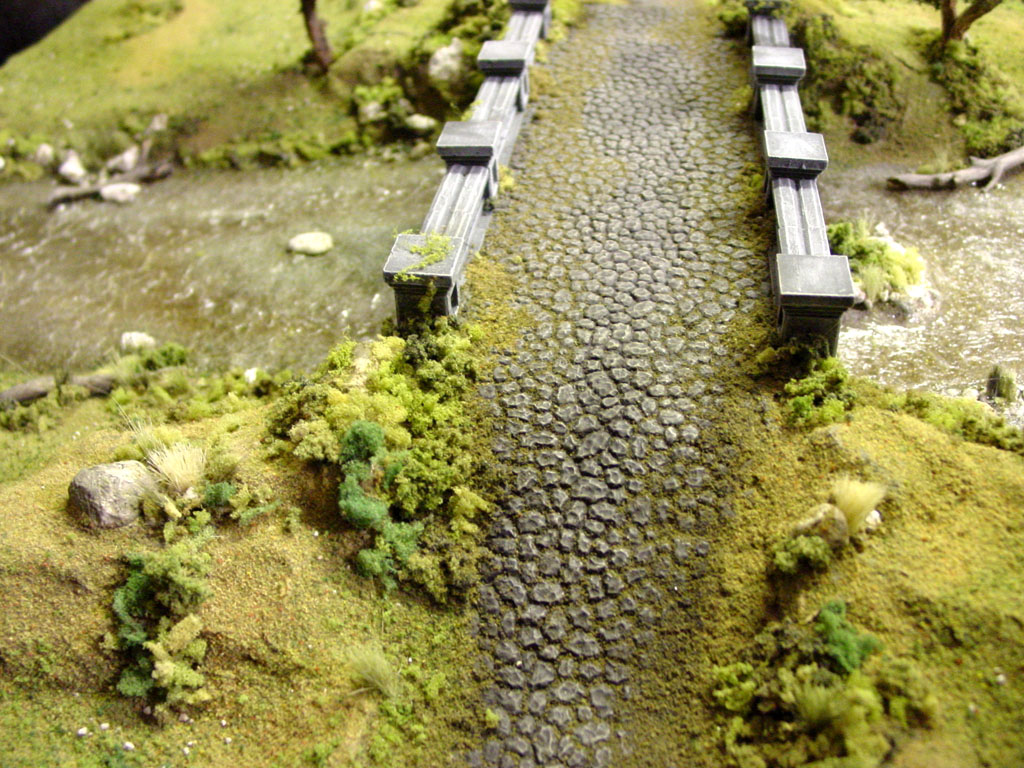
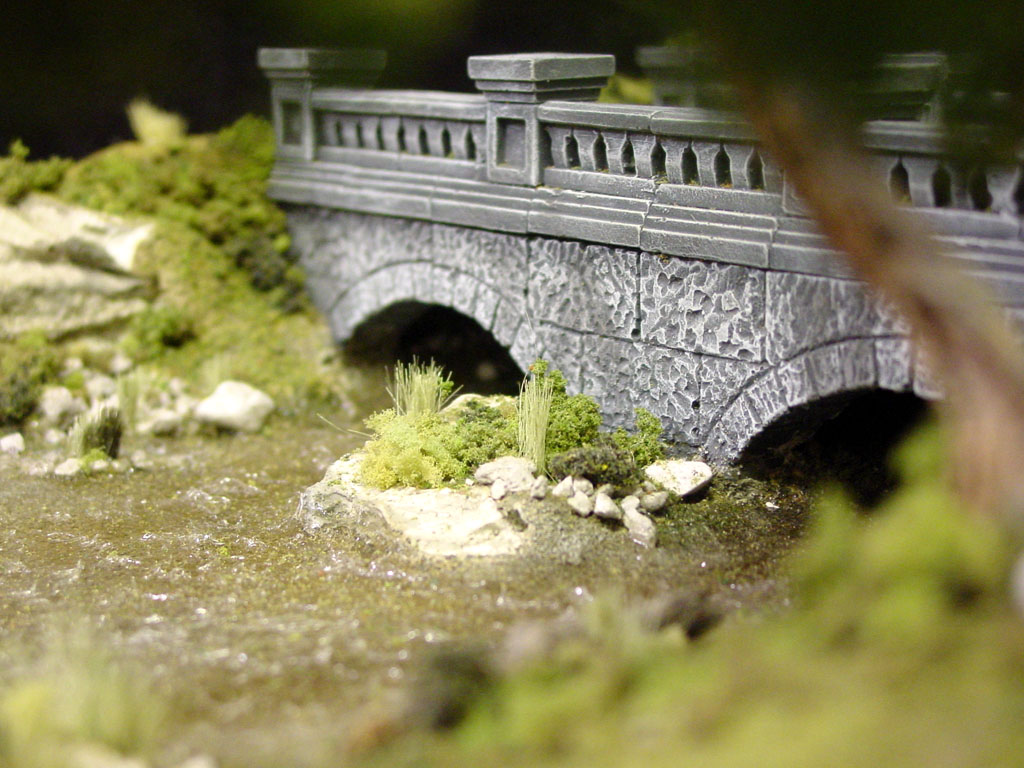
this piece is the use of curved cobblestone pieces cast from the Hirst Arts Cobblestone #210 mold to give the appearance of rolling terrain. This piece also features Woodland Scenics Realistic Water and Water Effects.
The base is 24x24x1/2 inch plywood from Lowe's precut lumber section. On top of the base is 3/4 inch blue board insulation.
Finished Images
(Click image to enlarge)
Construction Images
- Carving out the river bed
The river bed was cut with an exacto knife. The river was planned
to be 1/4" deep as shown by the black lines drawn on the foam. To get
the consistent depth, I used a pin which I bent 1/4" from the bottom. I
then was able to stick the pin in the foam to measure how deep the foam was
at any given point. The black lines were redrawn after material was
removed, another measurement was taken, then more material was removed if
needed.
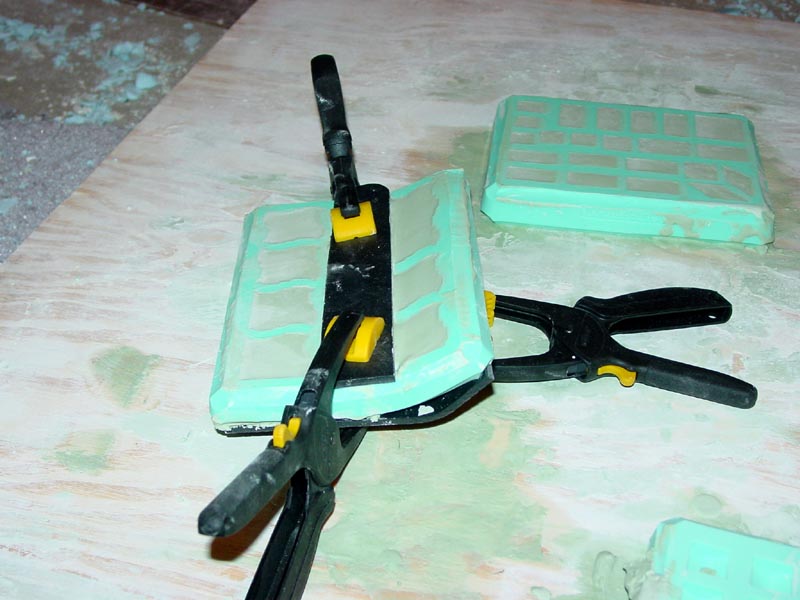
- Using a form to curve the cobblestone
A piece of plastic bent to a 30 degree angle was used as a form to bend
the cobblestone mold. The mold was poured as normal, scraped normally,
and left to dry for five minutes or so. The mold was then set on the
plastic form and then compressed with the clamps. The clamps were used
in conjunction with a scrap piece of plastic to secure the mold as it dried.
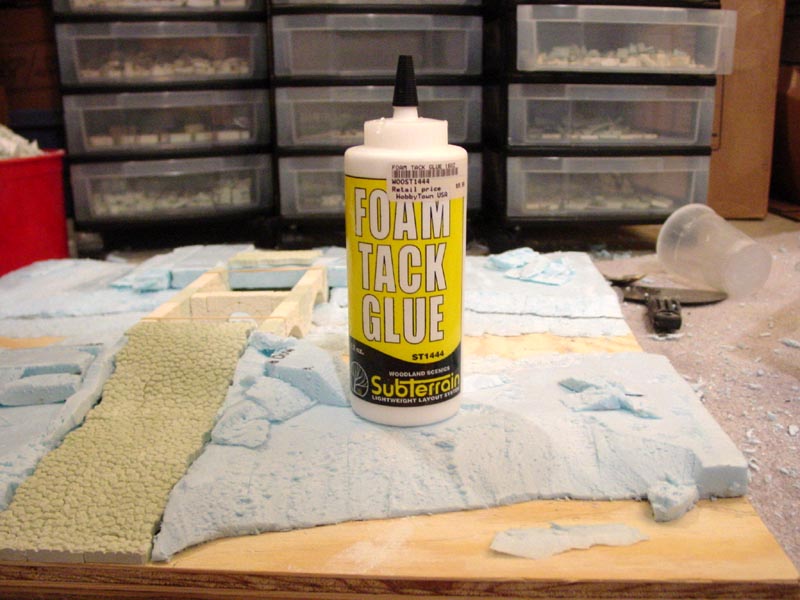
- Adhesive used to hold the foam together - Woodland Scenics Foam Tack Glue
Foam Tack glue is specially designed to hold foam together. By
nature, the foam does not breath to allow regular water based glue (Elmer's
white glue) to dry properly.
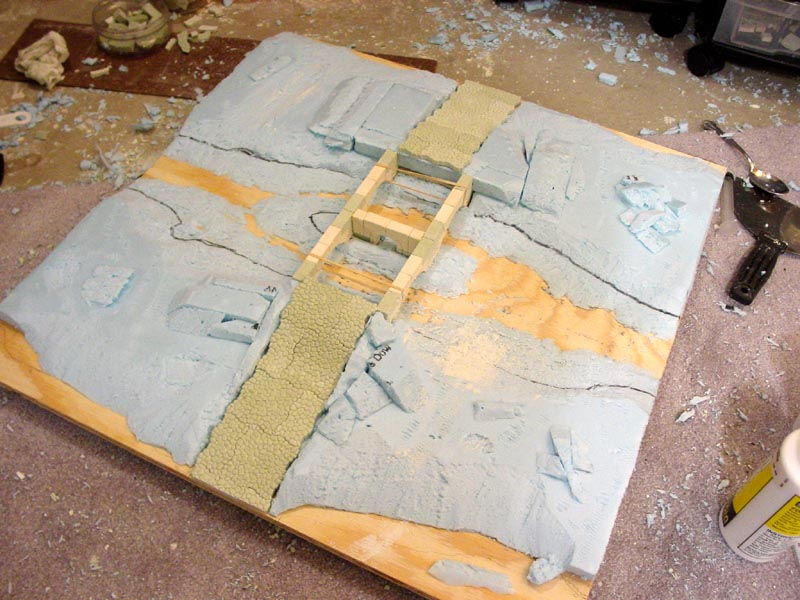
- All of the foam on the layout
The foam has been secured using Woodland Scenics Foam Tack
glue. The cobblestone road has also been placed at this stage and glued
in place. The top of the bridge was constructed well in advance and
was placed between the road sections to keep everything lined up properly.
The top of the bridge was left off until basically the entire layout
was complete.
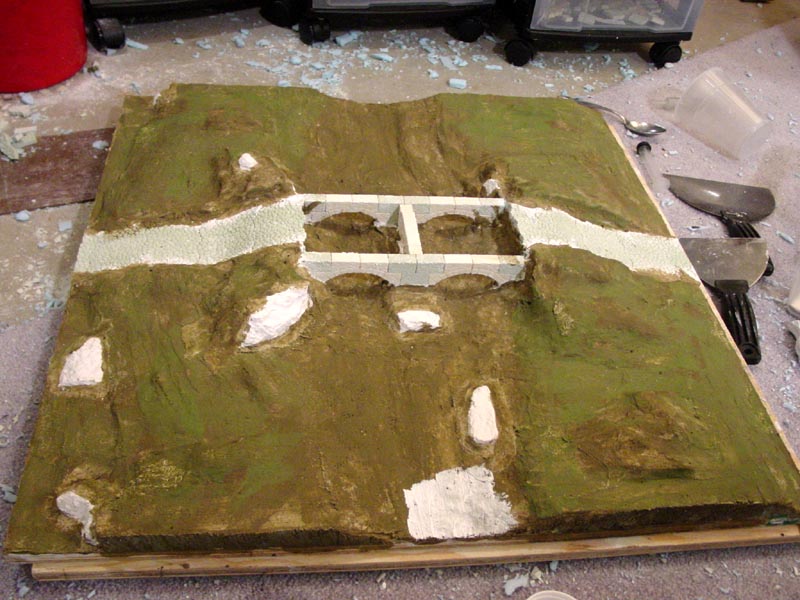
- Layout covered in Woodland Scenics Plaster Cloth
To provide a secure surface for the flock to apply, a layer of plaster
cloth covered the entire layout (except for the road and bridge).
- Base coat of paint - Woodland Scenics Earth Undercoat (green and brown)
The layout was then painted green and brown to prevent the white from showing through the flock once applied.
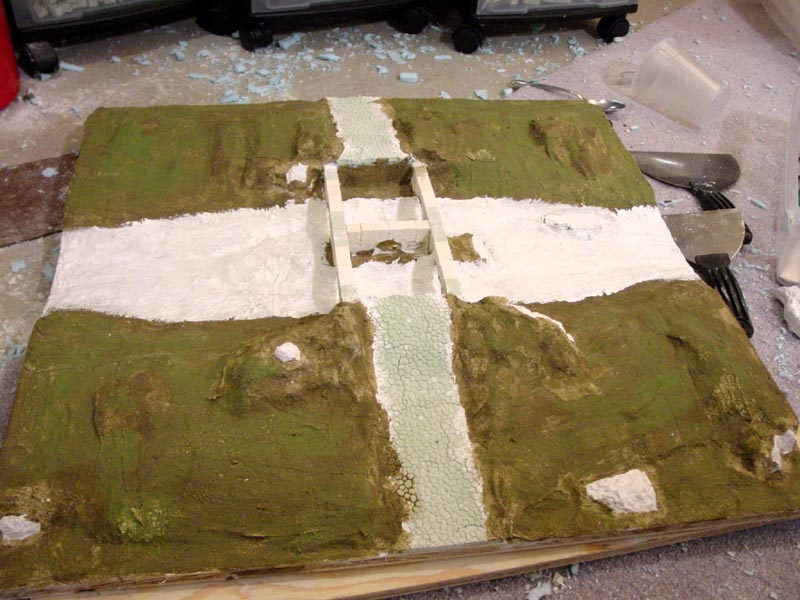
- River bed sealed with Woodland Scenics Flex Paste
To prevent the Realistic Water from seeping out, the entire river bed was sealed with Flex Paste.
- River bed half filled with Woodland Scenics Realistic Water
To contain the 'water', two dams were constructed using 1/8" hardboard
and masking tape. Kleen Clay was used to seal around the edges. Since
the maximum recommended pour depth for the Realistic Water is 1/8", it had
to be poured in two layers to get the desired 1/4" depth. It takes
at least 24 hours for the water to dry. I left it for two days just
to ensure that it was completely dry before pouring the second layer. Once
the second layer dried, I noticed that the water had shrunk somewhat. In
some places the river was slightly concave. I believe this was due
to the great variance of depth of the river. In the center it is about
1/4" and it goes down to zero depth up the river banks.
- Water covered with Woodland Scenics Water Effects (before drying)
After the second layer of Realistic Water had dried, the Water Effects
was applied. Unfortunately I put on the water effects on a little too
thick so some milky white coloration remains. It didn't help that I
tried to compensate for the concave nature of the river by applying extra
Water Effects in the center to help build it up. Fortunately, after
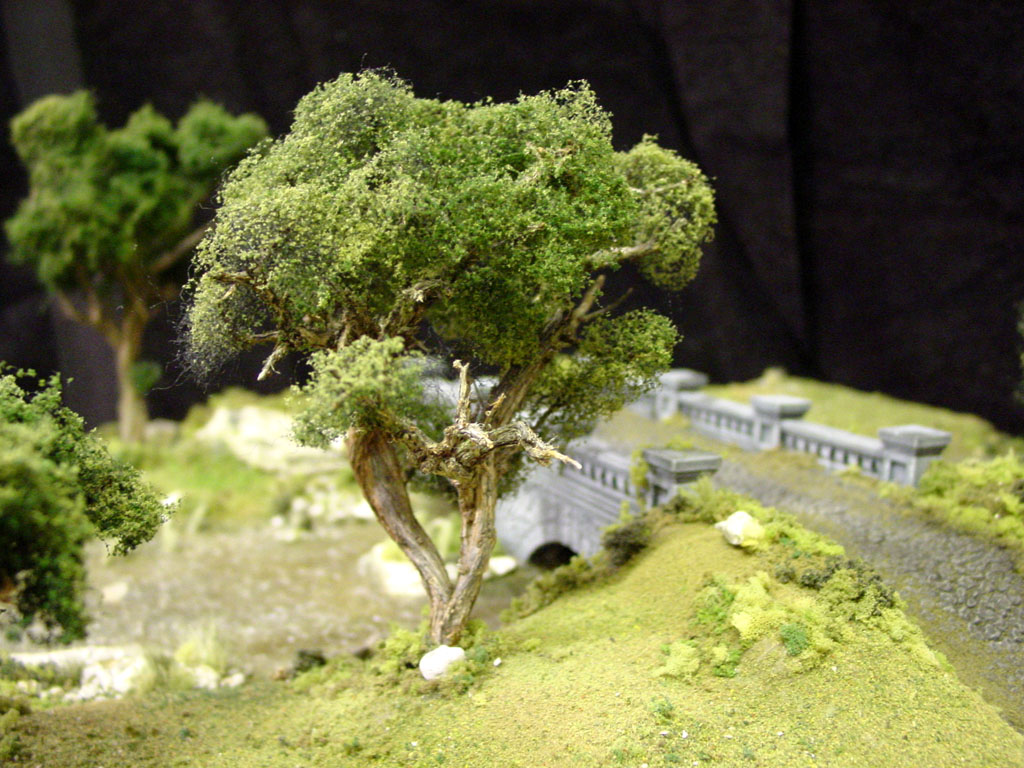
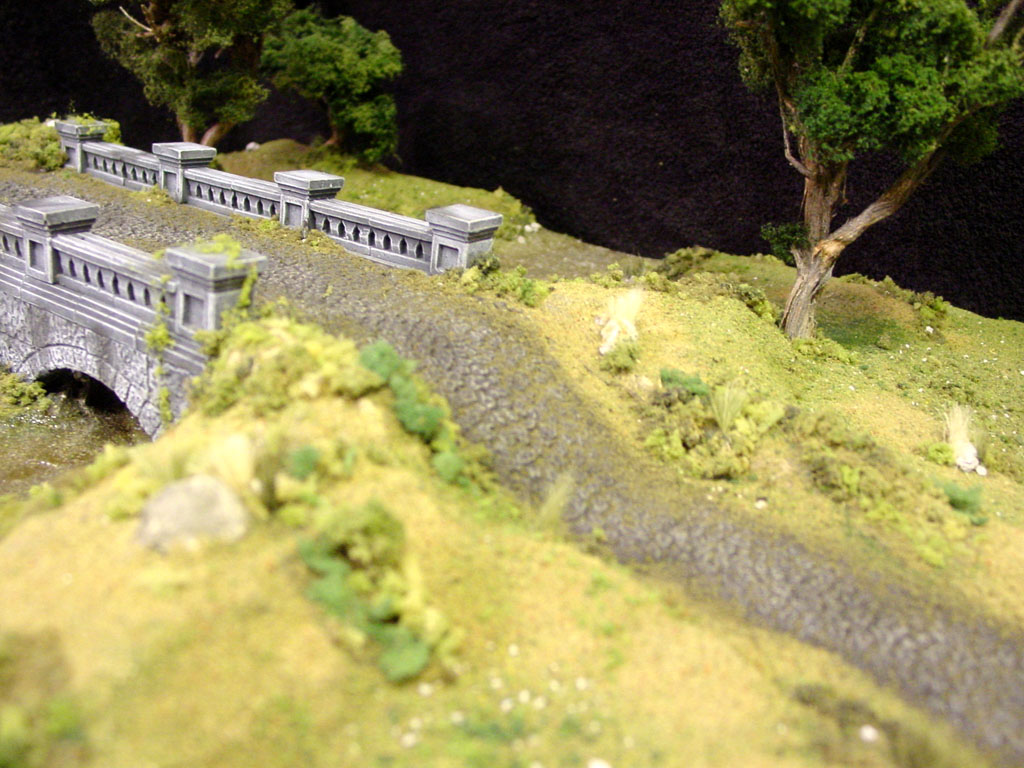
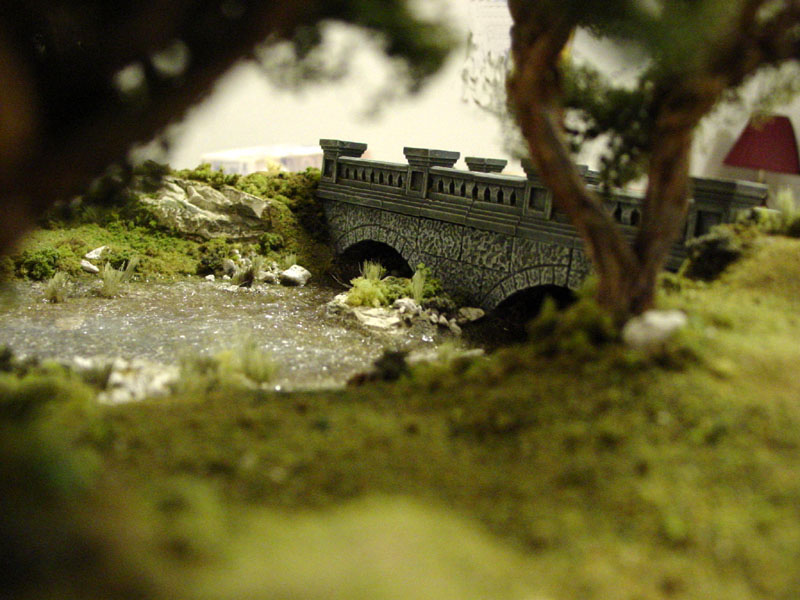
several weeks of drying it doesn't look too bad. - Looking through the trees towards the bridge
Neat angle with lots of nice shadow effects
Back to the main page
Resources
Questions? Comments? Email me at: ryan@skow.org